Please see the photos below for step-by-step instructions on how to set up Gmail as your email client for your @domain.com accounts.
There are two processes. "Send mail as" and "add another email account"
To begin, log into your Gmail account and find the tools icon in the upper right hand corner of your gmail content area. It looks like a gear wheel. Click that and then scroll down to "Settings". Finally, you're going to click on the tab that says "Accounts and Import". 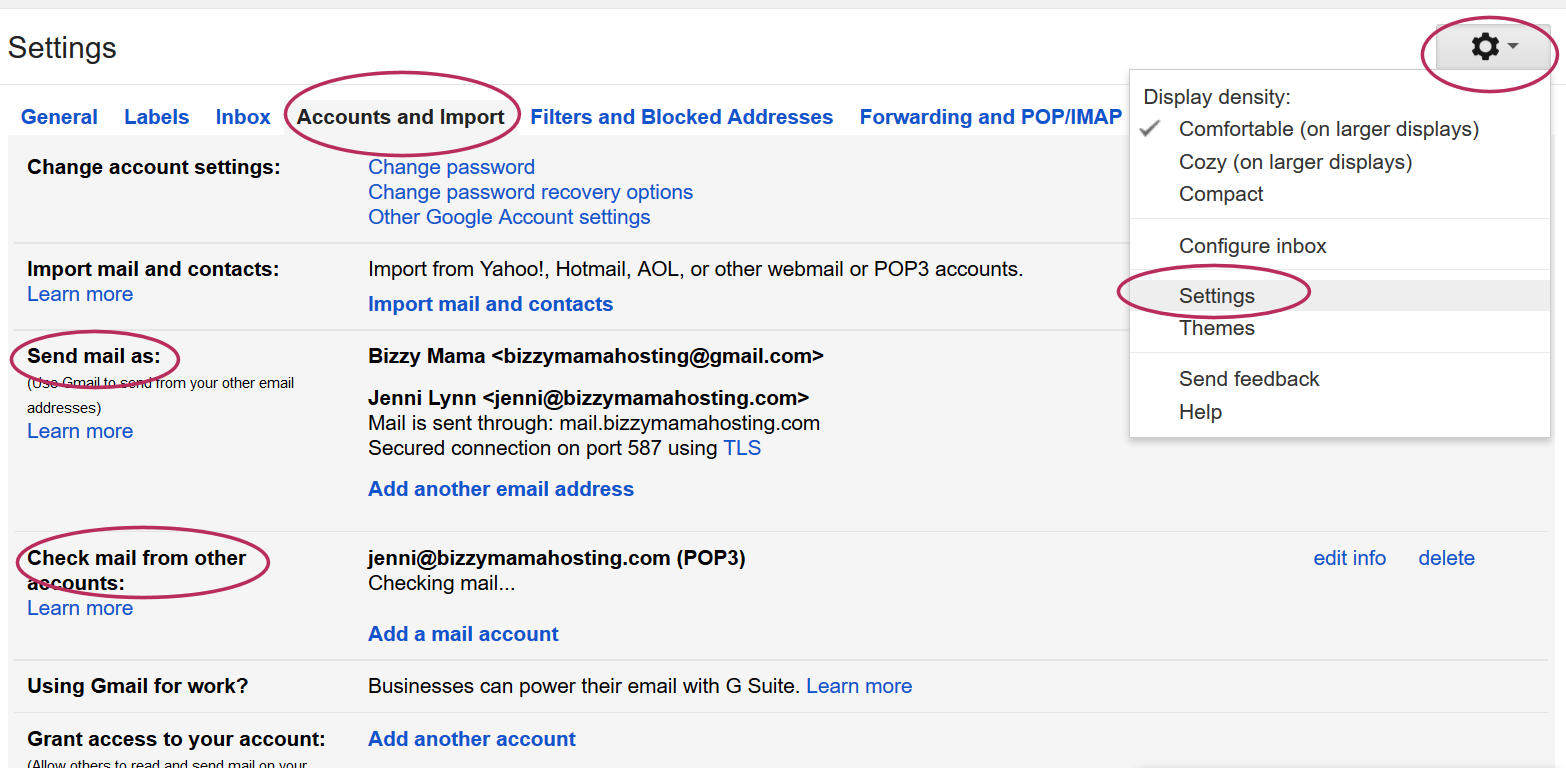
Let's start from the top and work on "Send mail as" first. Find that heading to the left and then click on the "Add another email address" link. On the pop up screen, enter your preferred display name (full name, business name, etc. This is the name that will display as the sender when you send someone an email from this account) and then your email address. This is your full email ie: sales@mydomain.com. Finally, check the bo for "Treat as alias". When complete, click "Next Step"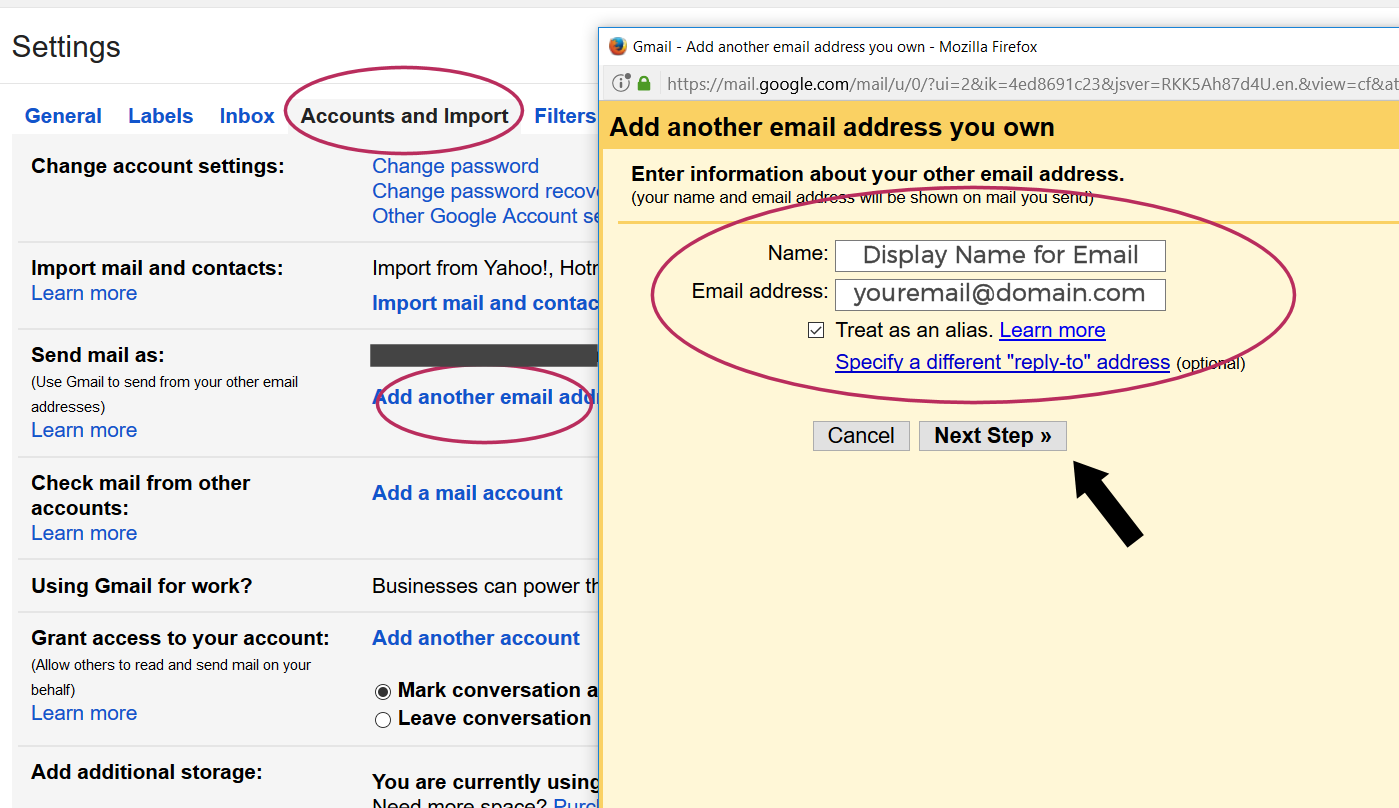
The next screen is where you will enter your SMTP information. These details were provided to your in your New Account Email. If you do not have them you may contact us at any time to receive them again. (I will also post generic details below that can be edited with your own info)
SMTP Server: mail.yourdomain.com (or mail.yourdomain.net or mail.yourdomain.org, this will depend on your unique domain)
Username: Your full address ie: sales@yourdomain.com
Password: The password you chose when you create the account
Choose Port 587 from the drop down menu.
Leave checked or check "Secure connection using TLS (recommended)".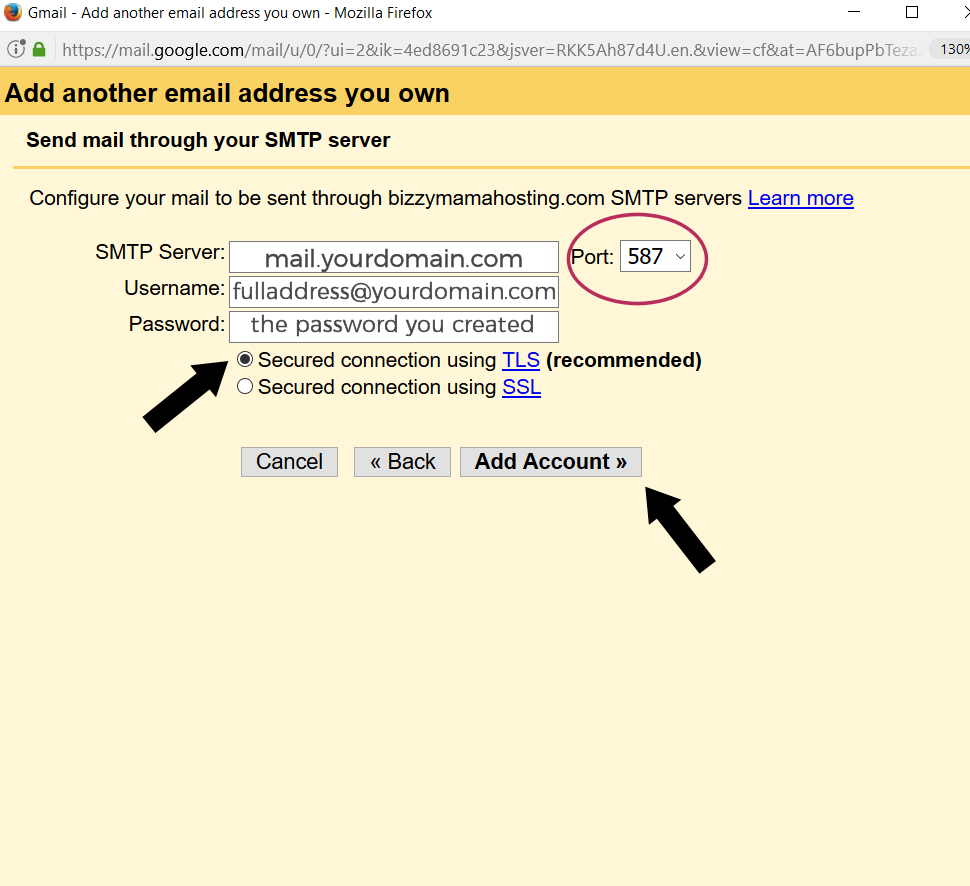
That completes the "send as" process.
Back on the main Settings screen, click on Add a mail account: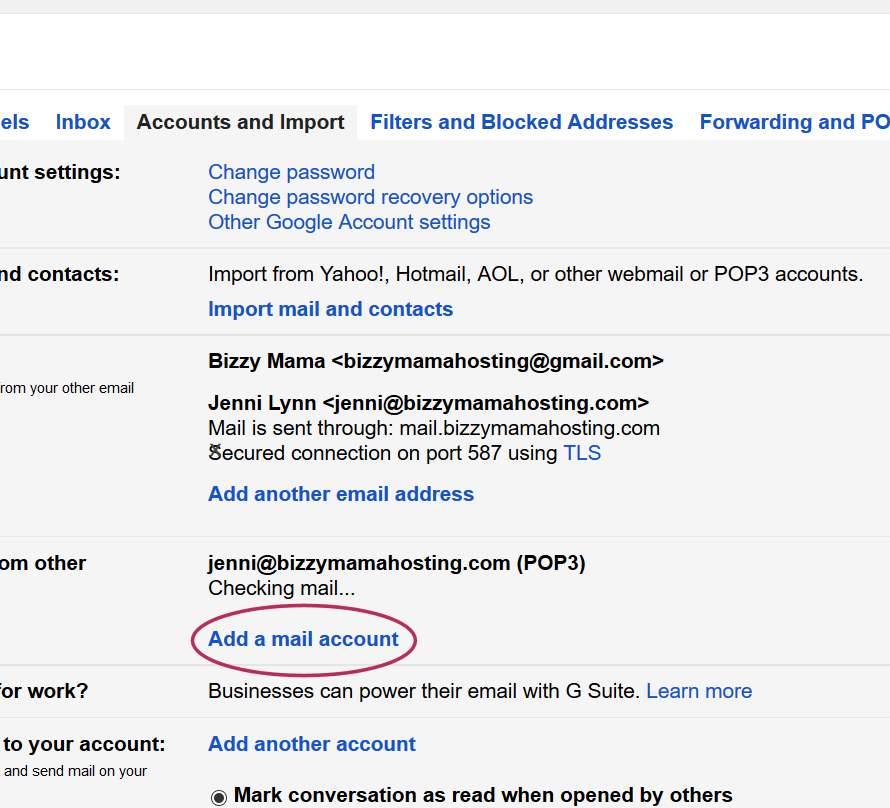
Enter the full address that you'd like to use ie: sales@yourdomain.com and click next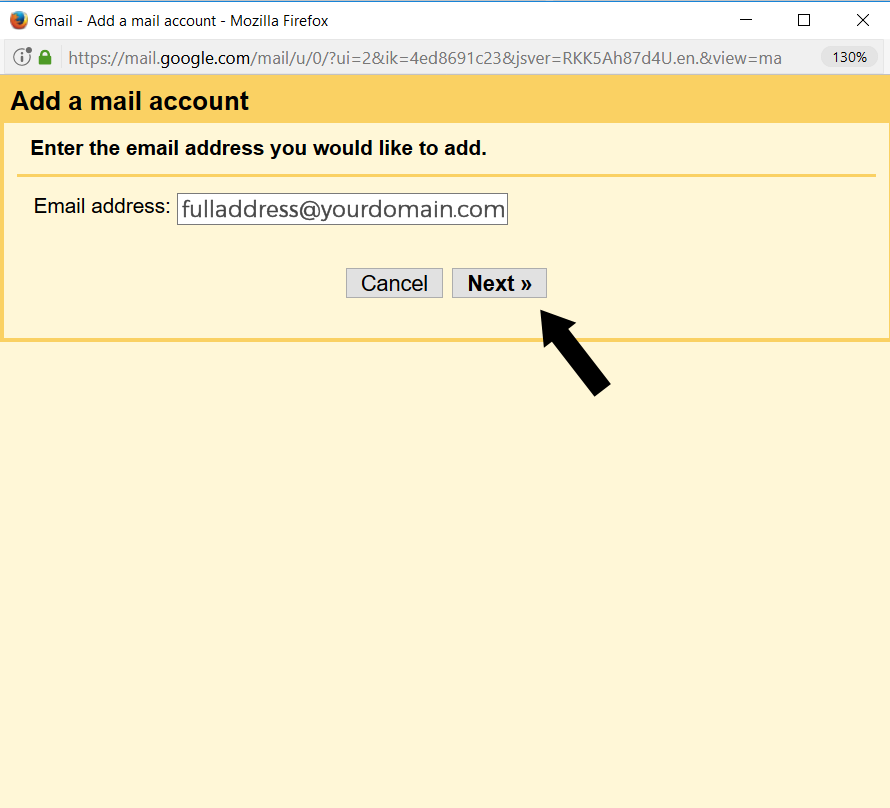
Select or leave selected: Import emails from my other account and click Next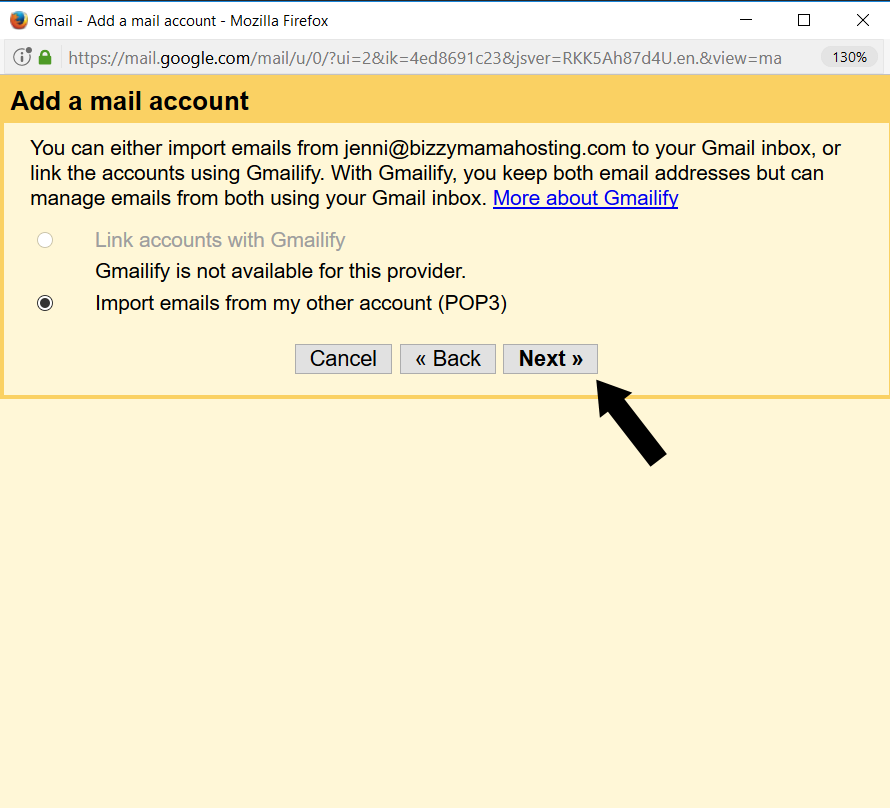
Your final step will be to input your incoming mail settings. These settings were provided in your New Account Email. If you do not have them, you may request them from us at any time or use the generic settings below, filling them in with your own unique details.
Username: Your full address ie: sales@yourdomain.com
Password: The password you chose when you create the account
POP Server: mail.yourdomain.com
Port: We suggest IMAP: 143
Suggested: Check: Leave a copy of retrieved message on server and, Label incoming messages
Click: Add Account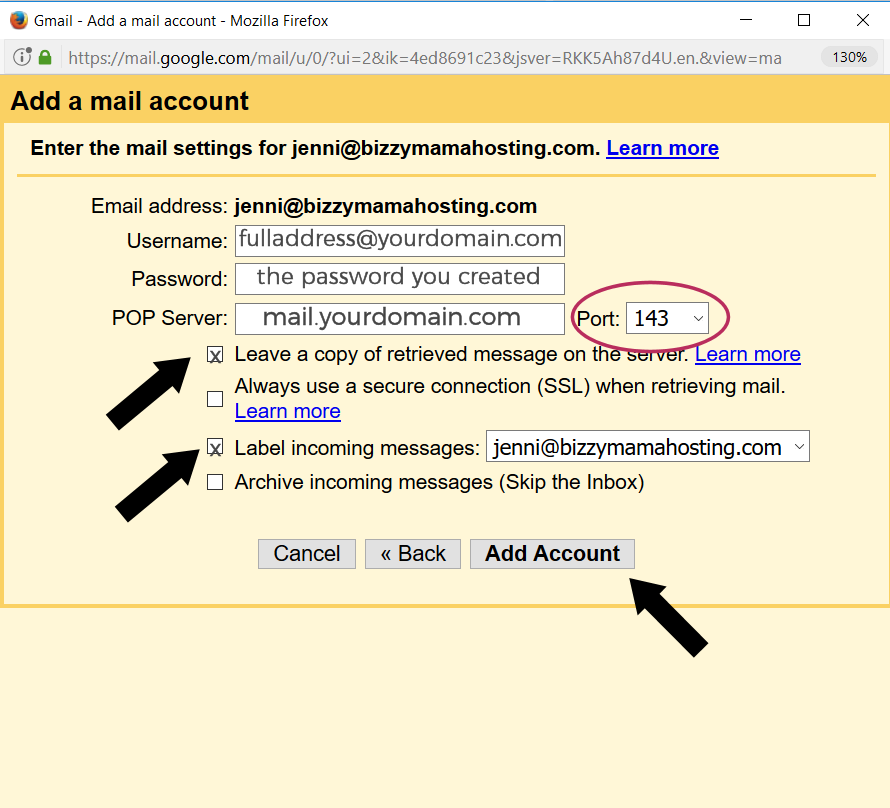
Gmail will likely as you to verify your account before it will work. They will send you an email with a code to input or a link to click. If you have problems connecting your email after completing all of these steps please feel free to reach out to us for help.
----------------------
Generic email settings for your review:
Email Settings
_To setup email accounts, you'll need to visit your cPanel. Once the accounts have been setup, you should use the following connection details in your email client:_
POP3 Host Address: mail.yourdomain.com
SMTP Host Address: mail.yourdomain.com
Username: The FULL email address you are checking email for (ie, sales@yourdomain.com)
Password: As specified in your control panel
POP Incoming port: 110 ***or*** IMAP Incoming port: 143
Outgoing port: 26
Please be sure the following options are checked, if applicable: "log on using secure password authentication" and "my server requires authentication."
- 2 Benutzer fanden dies hilfreich
